Posts

Showing posts from November, 2019

making menubar and menu on QML
Image
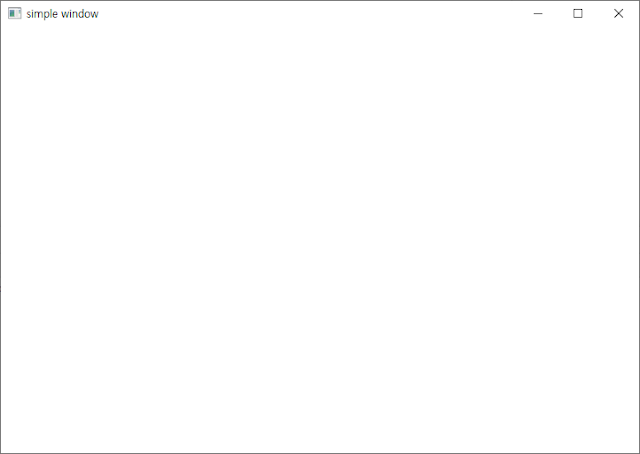
Qt Quick Control module has ApplicationWindow object that has menubar, toolbar, footer and contents areas. in this page, I will introduce how to make menubar. first of all, we need application engine in python. so you can learn the way how to make the application object in python from  how to use Qt Quick Controls in PySdie2 we need simple window like below. import QtQuick 2.13 import QtQuick.Controls 2.13 ApplicationWindow { visible: true width: 720 height: 480 title: "simple window" } WindowApplication is invisible by default. so, we should set the visibility to true. and the properties that I used above are derived from QML Item object. ApplicationWindow has its own properties like below. activeFocusControl : Control background : Item contentData : list contentItem : Item font : font footer : Item header : Item locale : Locale menuBar : Item palette : palette we will focus on only menubar property of them in this pa

Why I learn QML and PySide2

sometimes I feel like that I want to automate something boring when I work on computer. so, I decided to do it! first of all, I investigated what I should do in order to automate something. the result is like below. I should learn scripting. however there are two type of script in desktop environment. such as shell in Linux and batch in Windows. if I learn one of them, I can do only in one platform. so, I choose to learn python. if I learn python, I can do scripting in both of platforms. and then, I don't want to make text base UI. so, I found PySide2. PySide2 is wrapper for Qt that is GUI framework. at last, I want to make automation tool fast and easily. QML is good option for that. QML is Qt Modeling Language. so, if I learn it, I think I can make GUI fast and easily. I just need simple widgets like label, text editor, button and so on. so, I will pick and learn them. if you also have the reason like me, this blog will be helpful. because I will update this b

how to use Qt Quick Controls in PySdie2

Image
in general, QQuickView module is used to load QML file like below. from PySide2.QtWidgets import QApplication from PySide2.QtQuick import QQuickView from PySide2.QtCore import QUrl app = QApplication([]) view = QQuickView() url = QUrl( "view.qml" ) view.setSource(url) view.show() app.exec_() but, if we try to load the QML file that has the root of ApplicationWindow, it will be failed. if you want to load QML file of witch root object is ApplicationWindow, the QML file has to be loaded by QQmlApplicationEngine module. the example is like below. //QML import QtQuick 2.13 import QtQuick.Controls 2.13 ApplicationWindow { title : "Window Application" width : 640 height : 480 visible : true Button { text : "simple button" } } //Python from PySide2.QtCore import QUrl, Qt from PySide2.QtGui import QGuiApplication from PySide2.QtQml import QQmlApplicationEngine QGuiApplication . s

how to declare object in QML

Image
QML file can have only one root object. and the root object is represented as a tree with children objects. a object is declared by the object type and a set of curly braces. below code is a simple example declaring a object. Item { width : 200 height : 200 } some attributes can be contained in the braces. in above example, width and height attributes are contained in Item object. the way to declare children objects is like below. Rectangle { width : 200 height : 200 color : "red" Rectangle { width : 100 height : 100 color : "blue" Rectangle { width : 50 height : 50 color : "black" } } } root is representing red box. and children objects are representing blue and black in sequence. if above example code is executed, you can see that image. in above example,  each object has width, height and color. it looks

let's see the structure of QML document

Structure of QML the structure of QML has two parts import statements root object declaration Import QML document can import necessary modules and namespaces with "import statement". QML dosen't preprocess the import statements unlike other compiler languages such as C, C++ and JAVA. QML import just instruct the references to QML engine. QML document must import QtQuick module at least. and if QtQuick is imported, any QML document in the same directory can be referenced by default. import QtQuick 2.0 //this import must be there Item { width : 200 height : 200 } Object declaration QML document describes the hierarchy of objects. and each object has its own type, id, properties, methods, signals and signal handlers. and you should be careful of that you have to declare just one root object in one QML documentation. import QtQuick 2.0 //this import must be there Item { id : root width : 200 height : 200

let's start QML programming with PySide2

Image
What is QML? QML is UI programming language. it is some like the structure of JSON format. QML is supported by QtQML module. In other words, it is based in Qt framework. QtQuick module includes QtQML module. and QtQuick includes visual components, model-view support, animation framework and other many components to build UI. What is strength of QML? QML is derived from Qt. using QML means using Qt. Qt is cross-platform framework. so, once you are familiar with Qt, you can make desktop, mobile(andorid and ios) and embedded GUI application with only Qt knowledge. and you can choose what you use for back-end with c++ and python. when learning new programming, it would be best way to print "Hello World". so, I will show you how to print "Hello World" with QML and Python. first of all, you should make .qml file. I made View.qml file for example. and then, just type like below code. //View.qml import QtQuick 2.0 Rectangle { width: 200 height

Preferred QSizePolicy in PySide2

Image
preferred policy is very flexible policy. the size of widget can be smaller and larger than sizeHint(). let's check the example code right now. from PySide2 import QtWidgets, QtCore app = QtWidgets . QApplication([]) window = QtWidgets . QWidget() layout = QtWidgets . QHBoxLayout() PreferredButton = QtWidgets . QPushButton( "Preferred Widget" ) PreferredButton . setSizePolicy(QtWidgets . QSizePolicy . Preferred , QtWidgets . QSizePolicy . Preferred) layout . addWidget(PreferredButton) window . setLayout(layout) window . show() app . exec_() I created one button and set the property of size policy to preferred for both of horizontal and vertical policies. then, I run the application. first one is default size that evaluated from minimumSizeHint() function. every built-in widgets has its own reimplemented size hint function. I expected the size of widget is smaller when I decreased the size of window. but the size of widget is not smaller th

example of QSizePolicy Maximum in PySide2

Image
if you set the size policy property of widget to Maximum, the result of sizeHint() come to be maximum size of widget. it means that the size of widget cannot be larger than sizeHint(). from PySide2 import QtWidgets app = QtWidgets . QApplication([]) window = QtWidgets . QWidget() layout = QtWidgets . QHBoxLayout() MaximumButton = QtWidgets . QPushButton( "Maximum Widget" ) MaximumButton . setSizePolicy(QtWidgets . QSizePolicy . Maximum , QtWidgets . QSizePolicy . Maximum ) layout . addWidget(MaximumButton) window . setLayout(layout) window . show() app . exec_() QPushButton's minimumSizeHint() function is implemented. so, even if we didn't set the minimum size, the size of button cannot be decreased more than first image. and, when I increased the size of window, the size of button is not increased according to the size of window. because the size policy is Maximum that means the size of button cannot be larger than sizeHint(). as the result

QSizePolicy Minimum in PySide2

Image
if you set the size policy of any widget, the result of sizeHint() function come to be the minimal size of the widget. it means that the widget can be larger than sizeHint() but cannot be smaller than the sizeHint(). let's check it in example code. from PySide2 import QtWidgets app = QtWidgets . QApplication([]) window = QtWidgets . QWidget() layout = QtWidgets . QHBoxLayout() minimumButton = QtWidgets . QPushButton( "Minimum Widget" ) minimumButton . setSizePolicy(QtWidgets . QSizePolicy . Minimum, QtWidgets . QSizePolicy . Minimum) layout . addWidget(minimumButton) window . setLayout(layout) window . show() app . exec_() at first, I created window and layout. and then, I created QPushButton to check the minimum size policy. I changed the size policy of the button to Minimum. because the default size policy of QPushButton is minimum and fixed. in the last, I execute Qt application. and then I run this application to check the result.

QSizePolicy Fixed example in pyside2

Image
when you set the size policy property of widget to QSizePolicy::Fixed,  the size of widget is fixed. even if the space of layout is changed, the size of widget is fixed. layout management of Qt manages the position and the size of nested widgets. but if any of widgets has fixed size policy, the widget is not handled by layout management. widget has setFixedSize() function. if you use this function, the maximum size and minimum size of widget is set to that value. let's check this behavior from example code. from PySide2 import QtWidgets app = QtWidgets . QApplication([]) window = QtWidgets . QWidget() layout = QtWidgets . QHBoxLayout() fixedSizedButton = QtWidgets . QPushButton( "Fixed Widget" ) print (fixedSizedButton . sizePolicy()) fixedSizedButton . setSizePolicy(QtWidgets . QSizePolicy . Fixed, QtWidgets . QSizePolicy . Fixed) layout . addWidget(fixedSizedButton) window . setLayout(layout) window . show() app . exec_() I created window widg

What is QSizePolicy in pyside2

I think we should understand QSizePolicy class in order to understand layouting widgets in Qt. The size policy lets you provide default behavior for the layout management system. actually, there is some information in Qt official documentation for QSizePolicy. but it was not easy to understand them for me. so, I will explain about the policies as my understanding in this page. first of all, I just introduce the policies in this page. and then, from next page, I will explain about them one by one more detailed. there are 7 policies like below. QSizePolicy::Fixed QSizePolicy::Minimum QSizePolicy::Maximum QSizePolicy::Preferred QSizePolicy::Expanding QSizePolicy::MinimumExpanding QSizePolicy::Ignored for the background knowledge, every built-in widgets has its own size policy and the implementation of sizeHint() and sizeMinimunHint(). additionally, in order to expand and shrink, there have to be enough space for widget. and whatever the size policy is, the size

tuple type in python

Image
tuple is one of python sequence types. and tuple is immutable sequence type. "immutable" means that the data of tuple cannot be modified. at first, it would be good to see the declaration of tuple constructor. tuple([iterable]) and then, we can make tuple with some ways like below Using empty parentheses: () Separating items with commas: a, b, c or (a, b, c) Using the tuple() constructor or tuple(iterable) if you want to make empty tuple, do it like below t = () t = tuple () if you have some items to make tuple, do it like below t = ( 1 , 2 , 3 , 4 ) t = tuple ( 1 , 2 , 3 , 4 ) if you have any other sequence type data or customized iterable data to make tuple, do it like below sourceTuple = ( 1 , 2 , 3 ) sourceList = [ 1 , 2 , 3 ] t = tuple (sourceTuple) t = tuple (sourceList) it is very simple and easy to make tuple. let's try to make example code and see the result. t1 = () t2 = ( 1 , 2 , 3 , 4 ) t3 = tuple (t2) print (

how to use QHBoxLayout and QVBoxLayout in PySdie2

Image
it is very simple and easy to layout widgets with QH(V)BoxLayout. in this page, I will introduce how to use them with example code. have a look at below example code. from PySide2.QtWidgets import QApplication, QVBoxLayout, QHBoxLayout, QPushButton, QWidget app = QApplication([]) widget = QWidget() btn1 = QPushButton( "btn1" ) btn2 = QPushButton( "btn2" ) btn3 = QPushButton( "btn3" ) btn4 = QPushButton( "btn4" ) btn5 = QPushButton( "btn5" ) hLayout = QHBoxLayout() hLayout . addWidget(btn1) hLayout . addWidget(btn2) hLayout . addWidget(btn3) hLayout . addWidget(btn4) hLayout . addWidget(btn5) widget . setLayout(hLayout) widget . show() app . exec_() first of all, we have to import widgets that we will use. in this example code, I will use QApplication, QVBoxLayout, QHBoxLayout, QPushButton and QWidget. so I imported them. like below. from PySide2.QtWidgets import QApplication, QVBoxLayout, QHBoxLayout, Q

layout management in PySide2

Qt has Layout System. PySdie2 is wrapper of Qt5 for python. so that PySide2 supports Qt Layout System. in this page, I will what is the layout system and why we should learn it. and I will introduce them shortly. layout system is a simple and easy way to arrange child widgets automatically. Qt provide a few layout classes that layouts automatically position and resize width and height of widgets when the children are changed. they are in charge of below tasks. Positioning of child widgets Sensible default sizes for windows Sensible minimum sizes for windows Resize handling Automatic updates when contents change: Font size, text or other contents of child widgets Hiding or showing a child widget Removal of child widgets typically, there are 4 types of layout management classes. QHBoxLayout QVBoxLayout GRidLayout QFormLayout they inherit QLayout class. if you need more complex layout, you can nest them inside each other. I mainly focused what lay

first application using PySide2

Image
when developer starts with new framework, he print out "hello world". I think it's very good start point. because, we can see the structure of the framework at glance. so, I will make the application to print out "hello world" using pyside2. import sys from PySide2.QtWidgets import QApplication, QLabel app = QApplication(sys . argv) label = QLabel( "Hello World!" ) label . show() app . exec_() just code above lines. then, run this code. then, you can see below screen that present "hello world". in order to start pyside2 application, we have to import what we will use. in this example application, I used QLabel and QApplication. QLabel is a Widget that present text data. after importing, we have to create application object. and we can pass any parameter to the parameter of QApplication constructor. if you don't need any parameter, you can pass empty list object like below. app = QApplication([]) after creat

what we should use pyside2 or pyqt5 for python gui

at first, I considered about what I should use for python GUI. as a result, I found 2 options that are pyside2 and pyqt5. they are same framework in terms of that both of them are wrapping QT5. but there is also something different. about license, pyqt5 is licensed for GPLv3. and pyside2 is licensed for LGPL. LGPL is more free to distribute your application. so I think pyside2 is better than pyqt5 about license. if you need more detail, please search for them in google. user documentation is also very important. about this, pyqt5 is better. because there are so many information of pyqt5 in google. but pyside2 information is not much in google. but, Qt official site is providing the tutorial and example. so, I think it will be enough. in summary, I decided to use pyside2 for the future. I would make some utility application using this. something like work automation tool. I will learn it from Qt official site. and I will share my study in this blog. it's time to dig i

installation of pyside2

Image
I think pip is magic tool. because, when we need some external python modules, we just command pip with the name of the module. the way how to install pyside2 is also same to general way that python do. pip install PySide2 # For the latest version on PyPi after installation, you can test that pyside2 is installed well. import PySide2.QtCore # Prints PySide2 version print (PySide2 . __version__) if you can see the version information, installation is done!

python list sort

Image
python list have sort method. so, I will introduce how to use the method with example code. the method declaration is like below sort(*, key=None, reverse=False)  if you don't pass any parameter, "sort" method will compare items with only < comparison operation. "key" parameter has to be function object. through this parameter, you can define the key value to be compared. if you use lambda expression, you can make the key parameter easier. but if I introduce it in this page, it is out of range of this subject. so I will introduce lambda later. "reverse" define the order of sorting items. simply, the evaluation of comparison is reversed or not. list1 = [ 2 , 3 , 5 , 1 , 6 , 7 ] list2 = [( 1 , 2 ),( 4 , 3 ),( 2 , 1 ),( 3 , 4 )] def comp1 (item): return item % 3 def comp2 (item): return item[ 1 ] list1 . sort() print (list1) list1 . sort(reverse = True ) print (list1) list1 . sort(key = comp1) # items iwll be sorted

python list type

Image
list type is mutable sequence type. I will introduce how to make list object in this page. there are some ways to make list object. using square brackets with empty between the brackets the expression is like below var = [] if with empty brackets, empty list will be made. using a list comprehension. the expression is like below var = [x for x in iterable] "iterable" means that something like sequence types. and technically, something that implement "__next__" method. I will introduce iterable and iterator type in the next subject. so, in this page, it will be fine to think it of like sequence type. back to the main subject, you can make list items using "for" expression. the syntax is like above example code. using the type constructor. everything is object in python. it means list is also object that has type constructor. as a result, you can make the list object using type constructor. example is

bitwise operations in python

Image
python also have bitwise operations. and the operations works with only integer type. the operations are like below x | y          bitwise or of x and y x ^ y        bitwise exclusive or of x and y x & y         bitwise and of x and y x << y        x shifted left by y bits x >> y        x shifted right by y bits the y value ( right-hand operand ) has to be positive value. otherwise, ValueError will be raised. ~x            the bits of x inverted if you cannot understand the terms such as "and", "or" and "exclusive", refer to wiki page-logical operation. let's check the example code. x = 1 y = 3 print ( "x | y = {}" . format(x | y)) print ( "x ^ y = {}" . format(x ^ y)) print ( "x & y = {}" . format(x & y)) print ( "x << y = {}" . format(x << y)) print ( "x >> y = {}" . format(x >> y)) print ( "~x = {}" . format( ~

numeric type operations in python

Image
there are three numeric types in python int float complex python is dynamic typing language. so, we don't need to code the type explicitly. but, we can identify the type using "type" built-in function. x = 1 y = 3.6 print ( "x is {} type" . format( type (x))) print ( "y is {} type" . format( type (y))) there are operations for numeric types. I will introduce them in this page. x + y         sum of x and y x - y          difference of x and y x * y          product of x and y x / y          quotient of x and y x // y         floored quotient of x and y x % y         remainder of x / y -x              x negated +x            positive x abs(x)        absolute value or magnitude of x int(x)         x converted to integer float(x)      x converted to floating point pow(x,y)    x to the power y x ** y        x to the power y most of them is very similar to other programming language's operations and mathematical op